Moon Pie Recipe: 5 Easy Steps for a Homemade Classic
Table of Contents
There’s a certain magic in a moon pie that tugs at your heartstrings a soft, pillowy marshmallow center nestled between two crisp graham crackers, all wrapped in a velvety chocolate hug. Maybe it reminds you of lazy summer nights on the porch, fireflies dancing in the distance, or the first time you unwrapped one as a kid, wide-eyed and grinning.
For me, it’s the memory of my grandma handing me one fresh from her kitchen, the chocolate still slightly tacky on my fingers. That’s the kind of warmth you’re about to bring into your own home with this moon pie recipe. In just five simple steps, you’ll craft a homemade classic that’s as comforting as a familiar lullaby and way tastier than anything from a store shelf. Ready to roll up your sleeves and create something unforgettable? Let’s get started.
What’s a Moon Pie? A Quick Dive into the Classic Treat
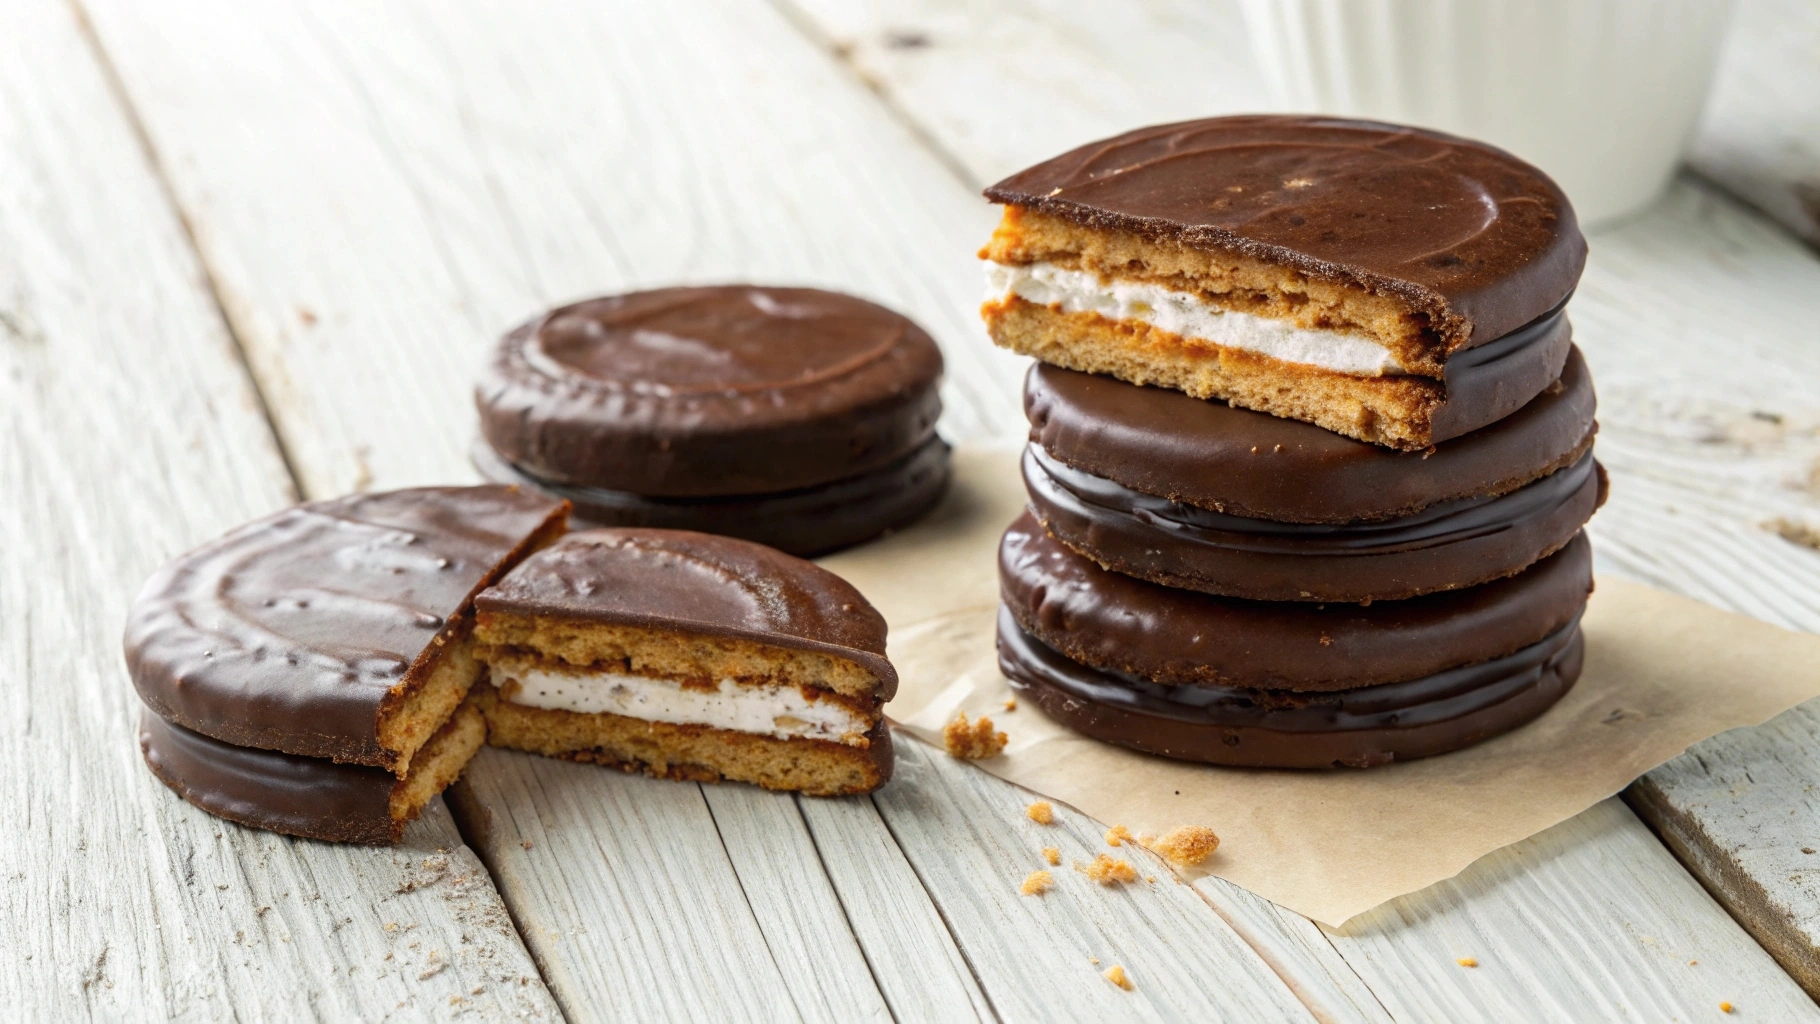
Before you whip out your mixing bowls, let’s take a moment to understand what makes a moon pie so special. If you’re wondering, “What’s a moon pie?” you’re not alone. This delightful treat hails from the American South, born in 1917 when Chattanooga Bakery dreamed up a snack hearty enough for coal miners. Picture this: a hardworking miner, covered in dust, pulling out a palm-sized confection two graham crackers sandwiching a fluffy marshmallow core, dipped in chocolate. It was cheap, filling, and downright delicious, earning its nickname from a miner who said it was “as big as the moon.”
Today, it’s more than just a snack; it’s a symbol of nostalgia, a bite-sized piece of simpler times. You’ll find the classic trio in every moon pie: graham crackers for that earthy crunch, marshmallow for a cloud-like sweetness, and chocolate to tie it all together in a glossy finish. Whether you grew up with them or they’re new to your radar, making your own lets you step into that legacy and tweak it to your taste.
Why Make Your Own Moon Pie Recipe?
Sure, you could grab a pack of moon pies from the store, but why settle for plastic-wrapped when you can craft something fresh, personal, and oh-so-satisfying? Making your own moon pie recipe puts you in the driver’s seat. You get to pick the chocolate dark and bold or milky and smooth. You control the sweetness, the texture, everything. Plus, there’s a quiet pride in pulling a tray of these beauties from your kitchen, knowing every layer came from your hands.
This isn’t just about flavor, though. It’s about the experience. Imagine the smell of graham crackers baking, the sticky thrill of piping marshmallow, the moment you dip them in chocolate and watch them transform. It’s a recipe for moonpies that doubles as a mini adventure one you can share with your kids, your partner, or even just yourself on a cozy afternoon. And don’t worry if you’re not a baking pro; these steps are beginner-friendly, using ingredients you likely already have. Here’s why you’ll love it:
- Customization is Yours: Swap in dark chocolate, add a sprinkle of sea salt, or experiment with fillings.
- Family Fun Awaits: Turn it into a bonding activity little hands love dipping and decorating.
- Bragging Rights Included: Nothing beats the glow of saying, “I made these from scratch.”
Ingredients: What’s in a Moon Pie?
So, what’s in a moon pie that makes it so irresistible? At its core, it’s a trio of humble components elevated to something extraordinary. You’ll need graham crackers (homemade or store-bought), a fluffy marshmallow filling, and a chocolate coating that seals the deal. Let’s break it down so you know exactly what you’re working with and how to tweak it if you’re feeling creative.
Table: Moon Pie Recipe Ingredients
| Component | Ingredient | Quantity | Notes |
|---|---|---|---|
| Graham Crackers | All-purpose flour, brown sugar, honey, butter | 2 cups flour, ½ cup sugar | Homemade for freshness, or grab store-bought to save time |
| Marshmallow Filling | Granulated sugar, gelatin, corn syrup, vanilla | 1 cup sugar, 1 tbsp gelatin | Whip it light and airy for that classic bounce |
| Chocolate Coating | Semi-sweet chocolate chips, vegetable oil | 12 oz chips, 1 tsp oil | Oil keeps it smooth and shiny |
Don’t have everything on hand? No sweat. You can swap all-purpose flour for a gluten-free blend if that’s your vibe. Out of corn syrup? Honey works in a pinch for the marshmallow. And if semi-sweet chocolate isn’t your thing, milk chocolate or even white chocolate can step up to the plate. The beauty of this recipe for moon pie is its flexibility use what you’ve got, and make it yours.
How to Make a Moon Pie Recipe: 5 Easy Steps
Now comes the fun part: turning those ingredients into moon pies that’ll have everyone asking for seconds. These five steps are straightforward, but I’ll walk you through each one with tips to ensure success. Grab your apron, preheat your oven, and let’s dive into this recipe for moonpies.
Step 1 – Craft the Graham Cracker Base
Your moon pies start with the foundation: graham crackers. You can absolutely use store-bought ones if you’re short on time, but making them from scratch adds a rustic charm that’s hard to beat. Here’s how you do it:
- Mix the Dough: In a big bowl, combine 2 cups of all-purpose flour, ½ cup of brown sugar, 1 teaspoon of baking soda, and a pinch of salt. Cut in ½ cup of softened butter until it’s crumbly, then drizzle in ¼ cup of honey and a splash of water. Stir until it forms a dough.
- Roll and Cut: On a floured surface, roll it out to about ⅛-inch thick. Use a round cookie cutter (about 3 inches wide) to make perfect circles—aim for 12-14 total, since you’ll need two per moon pie.
- Bake It Up: Pop them onto a parchment-lined baking sheet and bake at 350°F for 8-10 minutes, until they’re golden and crisp. Let them cool completely.
Pro tip: Poke a few holes with a fork before baking to keep them flat. These little discs are the crunchy backbone of your moon pie recipe, so take your time here.
Step 2 – Whip Up the Marshmallow Filling
Next, you’re crafting that dreamy marshmallow center. It’s sticky, it’s sweet, and it’s easier than you might think. Here’s your game plan:
- Cook the Syrup: In a small saucepan, heat 1 cup of granulated sugar, ¼ cup of corn syrup, and ¼ cup of water over medium heat. Stir until dissolved, then let it bubble until it hits 240°F on a candy thermometer (soft-ball stage).
- Bloom the Gelatin: While that’s cooking, sprinkle 1 tablespoon of unflavored gelatin over ¼ cup of cold water in a mixing bowl. Let it sit for 5 minutes to soften.
- Whip It Good: Once your syrup’s ready, slowly pour it into the gelatin while beating with an electric mixer on high. Add a teaspoon of vanilla and whip for 8-10 minutes until it’s thick, white, and fluffy.
You’ll know it’s done when it holds soft peaks. Work fast after this step it sets quickly!
Step 3 – Assemble Your Moon Pies
Time to bring it all together. Lay half your graham crackers flat, bottom-side up. Spoon or pipe a generous dollop of marshmallow onto each one about 2 tablespoons per cracker. Top with another cracker, pressing gently so the filling spreads to the edges without breaking the base. Don’t worry if it oozes a little; that’s part of the charm. Pop these sandwiches into the fridge for 15 minutes to firm up before the next step.
Step 4 – Melt and Dip in Chocolate
This is where your moon pies become irresistible. In a microwave-safe bowl, melt 12 ounces of semi-sweet chocolate chips with 1 teaspoon of vegetable oil zap it in 30-second bursts, stirring between each, until smooth. The oil keeps it glossy and easy to work with. Now, dip each chilled sandwich into the chocolate, using a fork to coat it fully. Let the excess drip off, then place it on wax paper. Want a lighter touch? Drizzle the chocolate instead for a homemade vibe.
Step 5 – Chill and Enjoy
You’re almost there! Slide your chocolate-coated moon pies into the fridge for 20-30 minutes to let the coating harden. Once set, they’re ready to savor. Pour yourself a glass of milk, take a bite, and let the crunch, the fluff, and the richness wash over you. You’ve just made a classic and it’s all yours.

Tips for the Perfect Homemade Moon Pie Recipe
Want to take your moon pies from great to phenomenal? Here are some insider tricks to elevate your game:
- Shape Matters: Use a cookie cutter for uniform rounds—uneven crackers can make dipping tricky.
- Double the Chocolate: For an extra indulgent treat, dip them twice, letting the first layer set before round two.
- Storage Smarts: Keep them in an airtight container at room temperature for up to a week, or freeze for a month (they taste amazing cold!).
- Speed It Up: If the marshmallow sets before you’re done piping, warm it gently over a double boiler to loosen it.
Baking’s all about trial and error, so don’t stress if your first batch isn’t picture-perfect. The flavor will still knock your socks off.
Conclusion: Bring the Moon Pie Recipe Magic Home
Congratulations—you’ve just unlocked the secret to a homemade moon pie that’s equal parts tradition and triumph. With every bite, you’ll taste the crisp graham cracker you baked (or cleverly shortcutted), the marshmallow you whipped into clouds, and the chocolate you draped like a pro. This isn’t just a moon pie recipe; it’s a little slice of joy you’ve crafted from scratch. So why stop here? Share them with your crew, tweak the flavors, or make them a weekend ritual. Your kitchen’s now a moon pie haven embrace it. Got a story about your first batch? Drop it in the comments below I’d love to hear how this classic came to life for you!
FAQ: Your Moon Pie Recipe Questions Answered
What is a moon pie made of?
It’s a heavenly combo of graham crackers, marshmallow filling, and a chocolate coating. Simple ingredients, big impact.
Can I make this moon pie recipe gluten-free?
Absolutely! Use a gluten-free flour blend for the crackers or grab pre-made gluten-free ones. The rest adapts easily.
How long does it take to make a recipe for moon pies?
Plan for 1-2 hours, including chilling time. It’s a leisurely project perfect for a relaxing day.
What’s the best way to store homemade moon pies?
Stash them in an airtight container at room temp for a week, or freeze them for up to a month. They’re delicious either way.